Google Calendar
An Admin connects a writable calendar in Settings → Integrations. In a meeting workspace, choose Sync configured calendars to send that meeting's title, notes as the description, and times and review the provider result.
Daily operations
Operators manage meetings, attendance, corrections, excuses, reports, kiosk status, and can view the roster. Admins can also modify the roster, grant Admin/Operator credentials, and manage organization, security, integrations, privacy, updates, and destructive configuration.
Dashboard is the unified place to schedule meetings and open their attendance workspaces. It replaces the retired Home, Meetings, and Attendance sections. Choose Calendar to browse a rolling five-week schedule or Table to search and manage the full meeting list. Use the Meeting picker, a calendar event, or a table row to open one meeting.
The remaining primary areas are Reports, Roster, and Kiosks. Admins also have Settings. To manage dashboard accounts and their roster links, use Settings → Access, not Roster. After setup, an Admin can reopen the shared checklist through Settings → Guided Setup → Open guided setup.
Upload or paste CSV on Roster, select Preview roster, and inspect the parsed table. Choose Add or update to retain people not in the file, or Replace active roster to deactivate omitted people. Replacement preserves historical attendance and dashboard credentials. No roster write occurs until the confirmation button is selected.
An Admin connects a writable calendar in Settings → Integrations. In a meeting workspace, choose Sync configured calendars to send that meeting's title, notes as the description, and times and review the provider result.
Send one idempotent missed-meeting email or an individual attendance report to the email stored in the roster.
Linked members can privately run /attendance-report. Every five minutes, eligible meetings can also notify only linked absent members after scanning closes. A signed recipient button opens a contest; an Operator reviews it with a required note before attendance can change.
Upsert meeting calendar events. Authenticated heartbeats maintain one persistent kiosk-status message, and a five-minute reconciliation marks stale kiosks offline without blocking attendance.
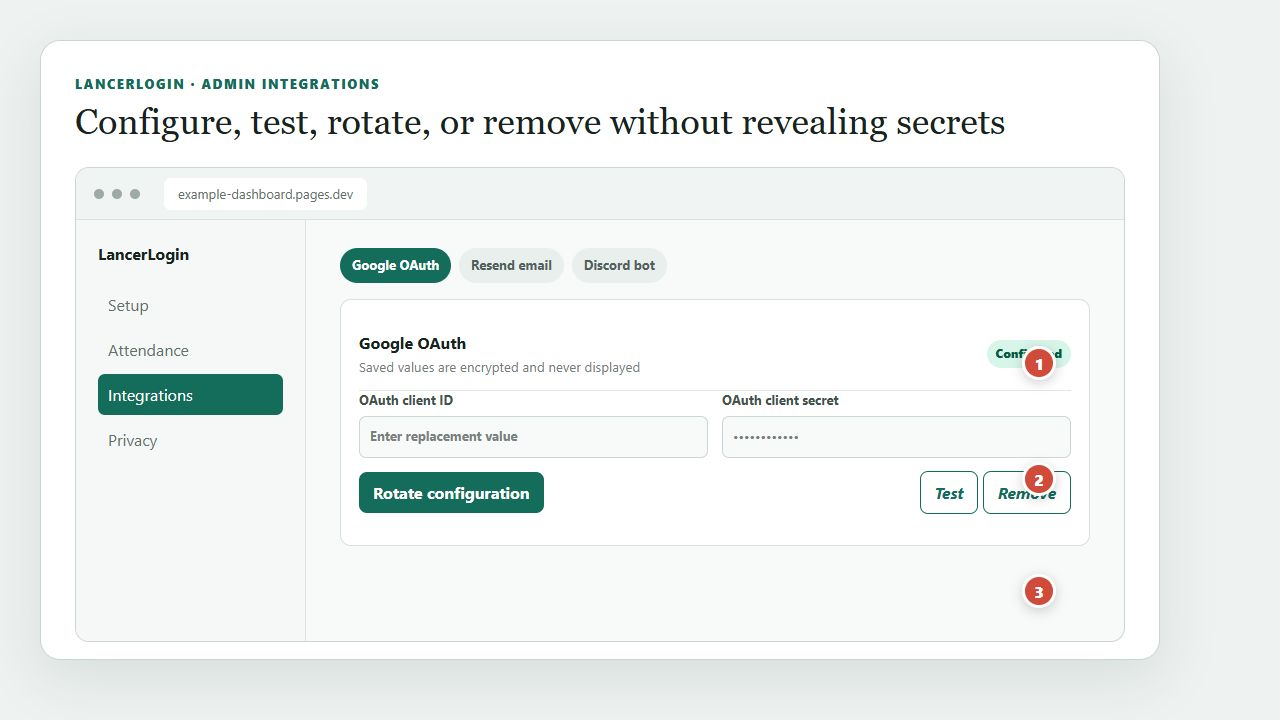
Configured status is visible, while saved credential values remain hidden.
Each provider must complete its real Google, email-code, or signed Discord proof.
Replacement values overwrite the encrypted configuration without exposing the previous one.
Open Settings → Integrations as an Admin. Open Google OAuth, Resend, or Discord for an official console link, exact callback value, required access, and guided verification. Fields appear immediately after the copy step that uses them. Saved secret values remain hidden, and a provider shows Configured only after end-to-end verification.
In Settings → Integrations, save the bot token, Application ID, public key, Server ID, and attendance channel ID, then choose Send Discord verification. LancerLogin validates that the bot token belongs to the saved application and server and creates or updates exactly the guild-scoped /pair and /attendance-report commands. No manual HTTP request or command payload is required.
Guild scope keeps both commands out of direct messages and every other server. Rerunning verification or replacing credentials reconciles the same two commands without duplicates. If Discord rejects the credential, identifiers, permissions, command update, or verification message, LancerLogin remains in Verification required state and shows safe retry guidance.
Keep the exact Interactions Endpoint URL from LancerLogin in Discord's General Information page. Install the bot with only the access listed in the Integrations guide and restrict it to the attendance channel. Both commands return ephemeral responses; /attendance-report works only for the invoking Discord account's single active roster link and never accepts another member ID.
An Admin-only notice appears when a newer public release is available. Open Settings → Updates. In the Dashboard card, choose Back up and begin update, review the pinned release notes, download the entire-installation backup, save it securely, and confirm that it was saved. Then choose Start update to vMAJOR.MINOR.PATCH once. Refreshing resumes progress without starting again. Review required environment approval through the displayed GitHub link, and choose Reload updated dashboard only after verified completion. Diagnostics and manual recovery contains the recovery link. If it reports recovery required, stop and obtain authorized recovery assistance. Never automatically restore D1.
The Physical kiosk card updates the Pi separately. Choose Update to latest stable only when the kiosk is online and a newer compatible stable release is shown, then wait for it to return online with an updated installed-release status. If the release lookup is unavailable or the card does not show completion, treat the result as unconfirmed rather than retrying blindly. Use the Administrator's available on-device or remote access method, such as Raspberry Pi Connect or SSH, for an approved recovery procedure.
Settings → Data has independent backup, restore, and delete controls for Meetings and attendance, Roster, and Entire installation. Files restore only to their matching category. Entire-installation backups contain sensitive hashes and encrypted secrets, so protect them like administrator credentials. Reset onboarding clears only checklist progress. Attendance CSV protects spreadsheet formula markers as text. For files over 10 MiB or infrastructure recovery, use the repository’s token-neutral D1 helpers documented in docs/BACKUP-RESTORE.md.